Welcome to my PS70 portfolio! I hope you enjoy learning more about my project for PS70: Intro to Digital Fabrication.
02: 2D Design and Cutting
Summary
Thank you for viewing my project update! This week, the major assignment was to make a custom box using the laser cutter, but we also were tasked with working through some fusion tutorials and modelling two objects.
Scroll down or click any of the links below to navigate to each section of the assignment:
Fusion 360 Broccoli
To get some more experience with fusion, I worked through CAD CAM Tutorials' Fusion 360 YouTube Series. This helped me figure out a bit more about fusion, and to start making some simple objects:
Still, after like an hour and a half those tutorials honestly got pretty boring, so I decided that it was time to start learning by doing!
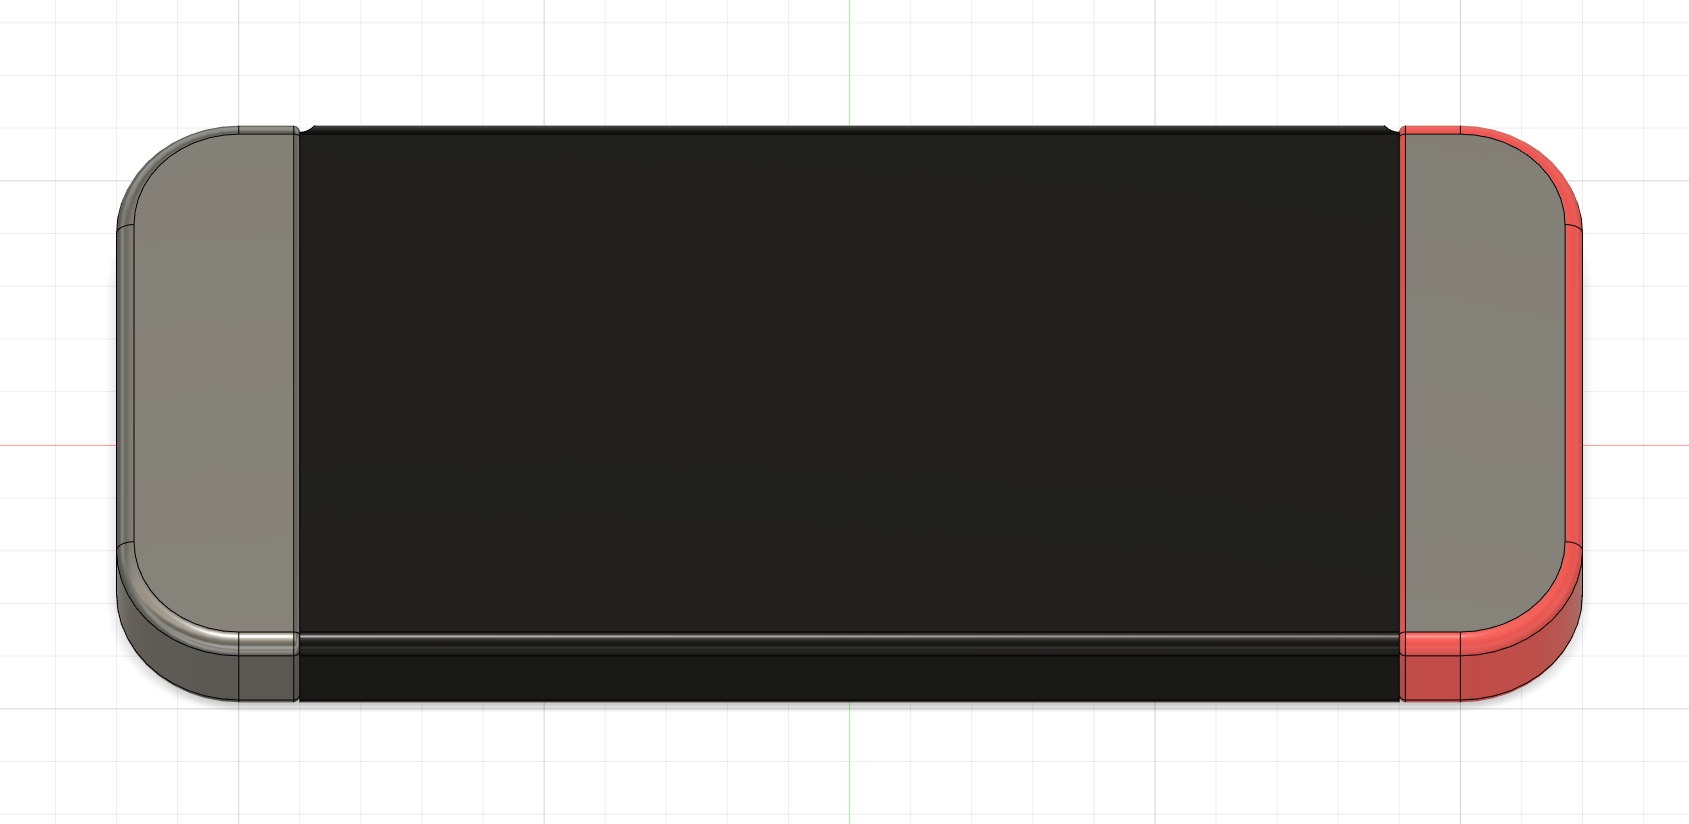
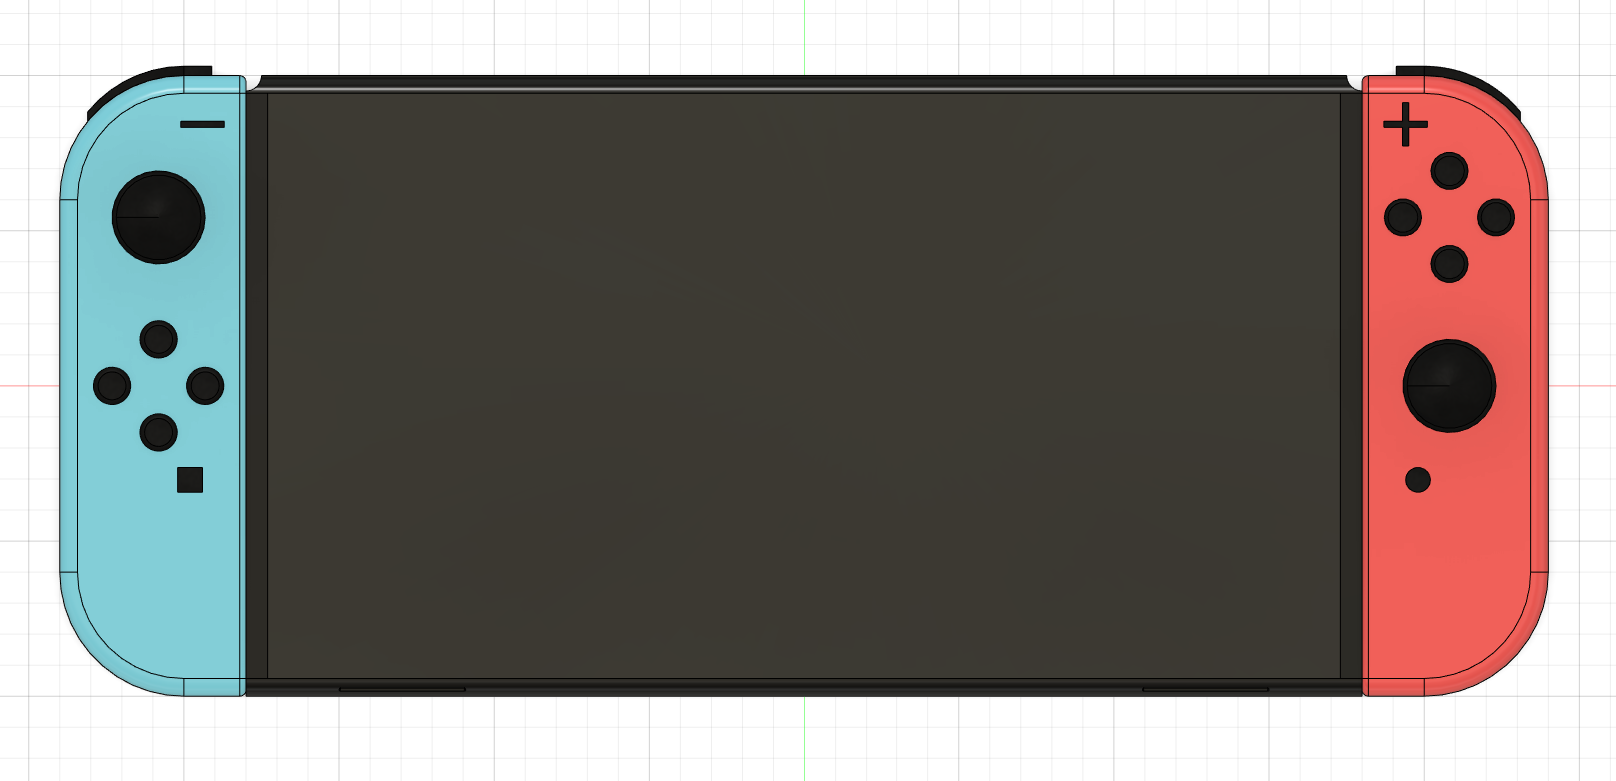
Object 1 : Nintendo Switch
For my first object, I wanted to model the Nintendo Switch console. It seemed to be mostly make of simple curves, but there were some tricky sections that took a bit to work out.
The main body wasn't too difficult, being mostly rectangles and circle sectors. In fact, most of it could be made by just extruding one sketch and then filleting the edges:
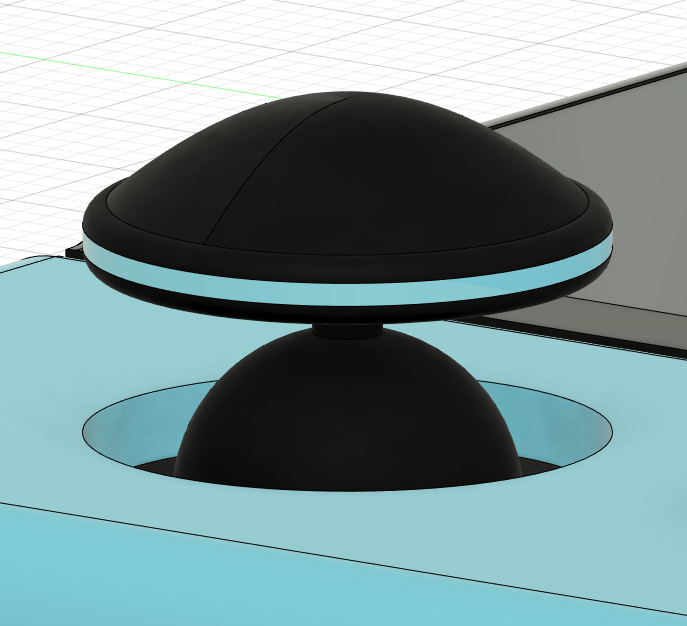
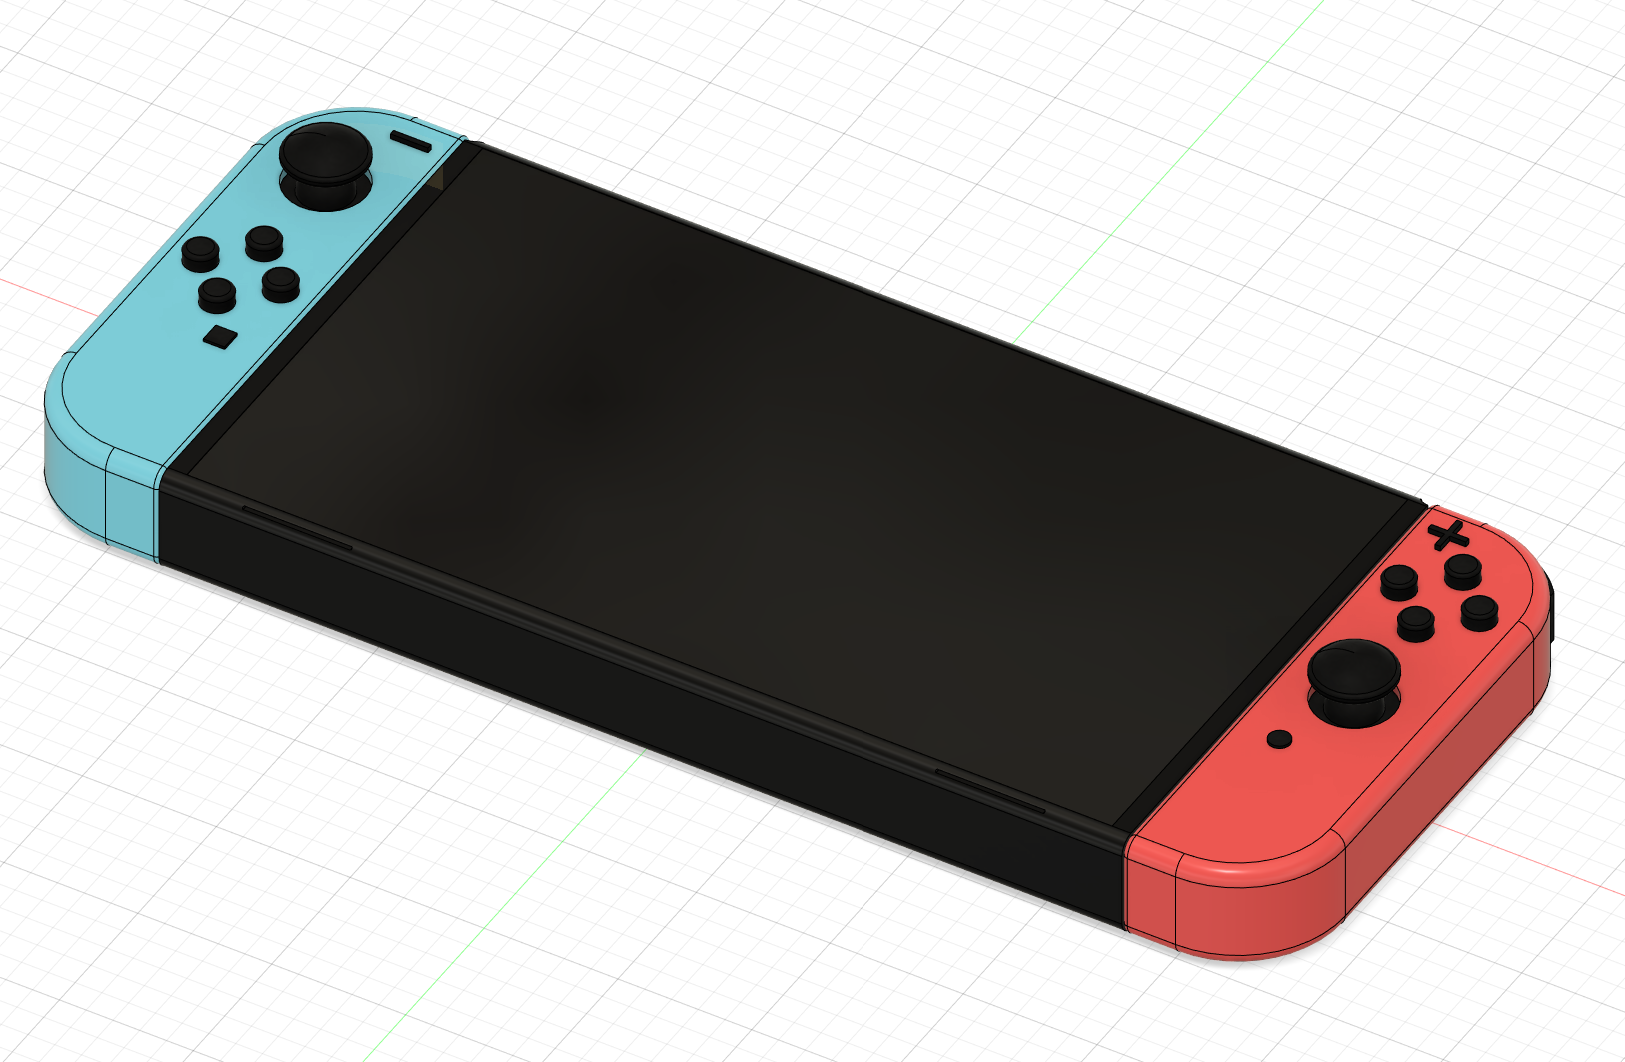
The real time-sink was figuring out how to do the joysticks. I tried to use cuts of circles again, but I ended up just using a custom spline to make the top bit. The rest is just a ball with a stick through it and a filleted disc on top:

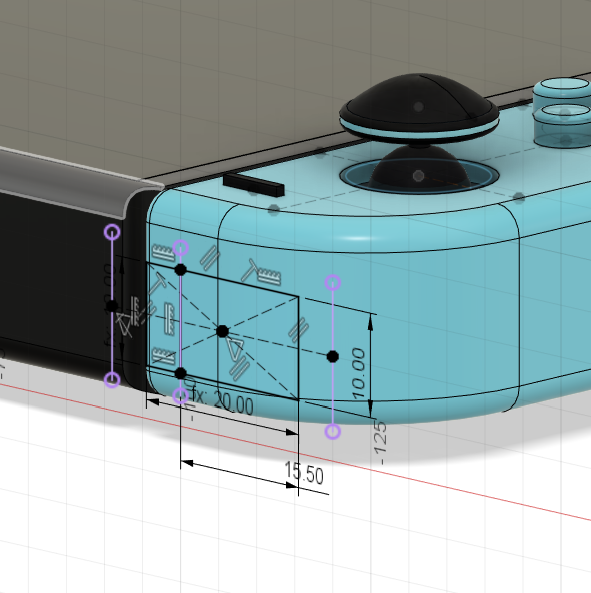
I think they ended up turning out pretty well! However, the other difficult component was a bit harder. I needed to create the curved L/R-bumpers on the back of the switch, but I had no idea how to make curved sketches to extrude. This ended up taking me down a few dead ends trying to learn how to project 2D sketch geometry onto curved surfaces (which you can apparently do, but you can't extrude from them). Eventually, I realized you can literally just extrude from the surface directly. Problem (mostly) solved!
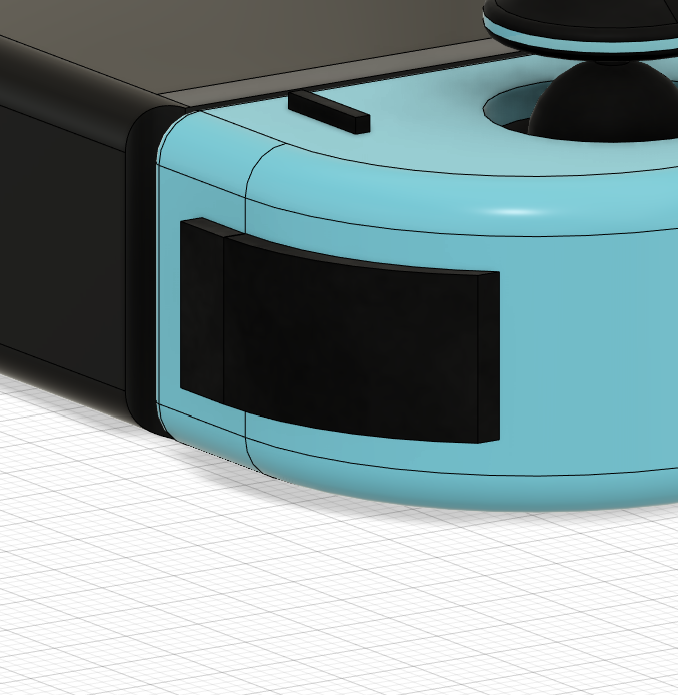
I didn't attempt some of the more complex geometry this time around, like the ZR/ZL bumpers beneath the primary bumpers, both for the sake of time and because I already felt like I was drinking out of a hose. So I eventually just colored it, and ended up with the final product:
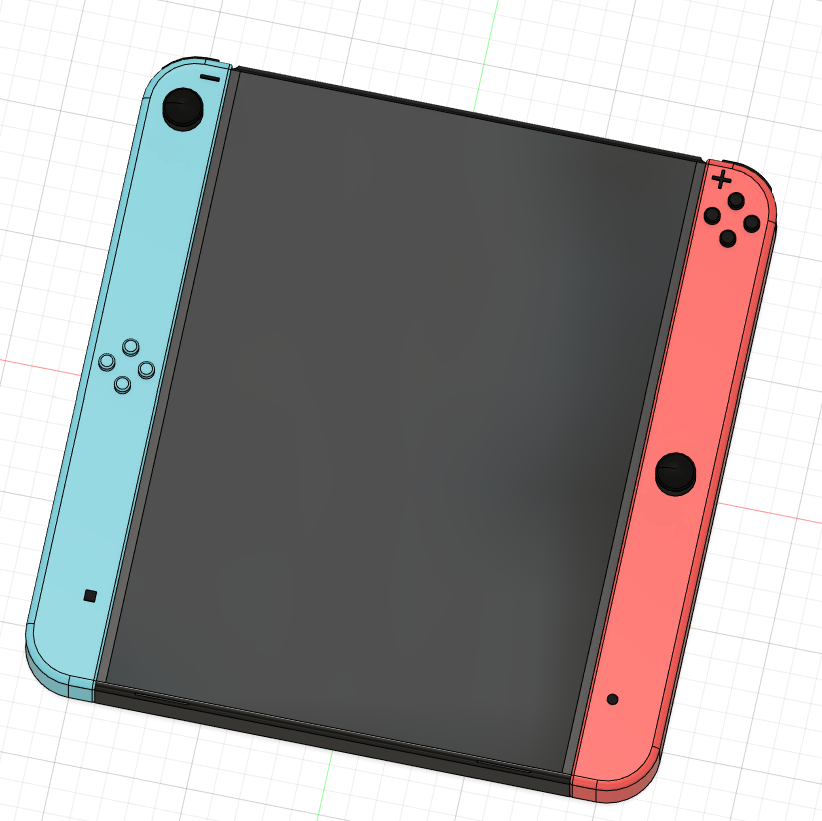
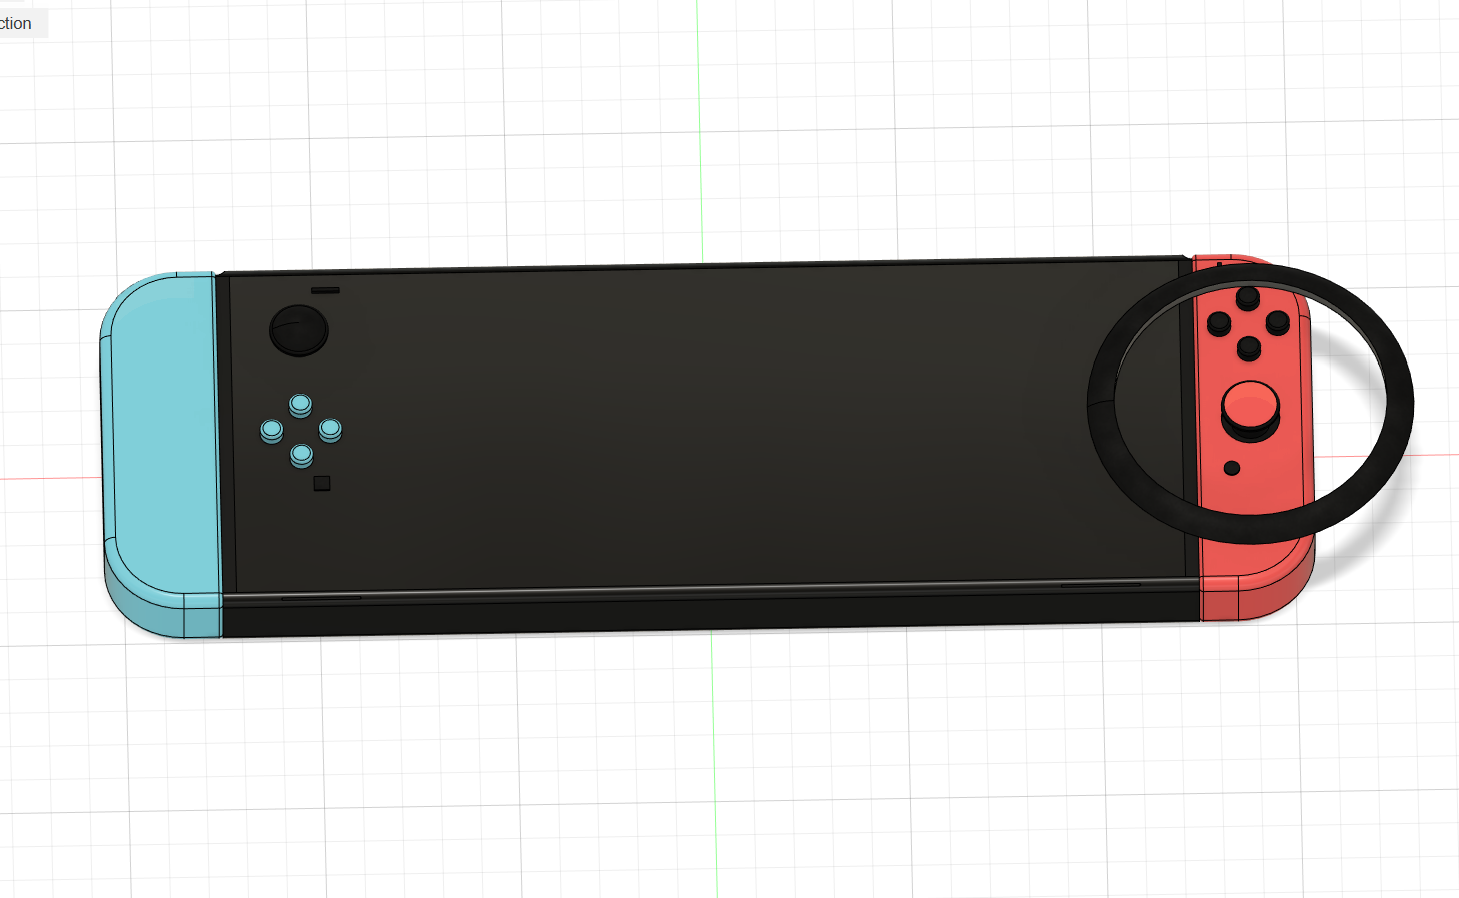
There remain a few major issues. Aesthetically, I hate how all of those sides where a line meet a circle have lines going all the way up, but I couldn't figure out how to remove them. I also had planned to later measure my switch's real dimensions and adjust them, but it turns out that something in my relative measurements went wonky, and so it didn't work out super well. While I can stretch the switch vertically as much as I want, something goes wrong when I try to horizontally stretch it:
I tried to figure out how to correct it but ended up getting a bit lost, and so I decided to just leave it as is. In future projects, I'll definitely make sure to test parameter changes at multiple points in the process to make sure that nothing like this goes wrong in the future.
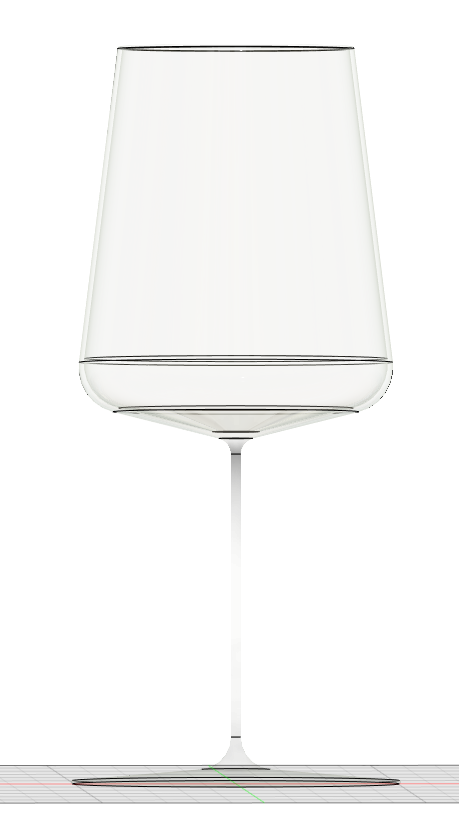
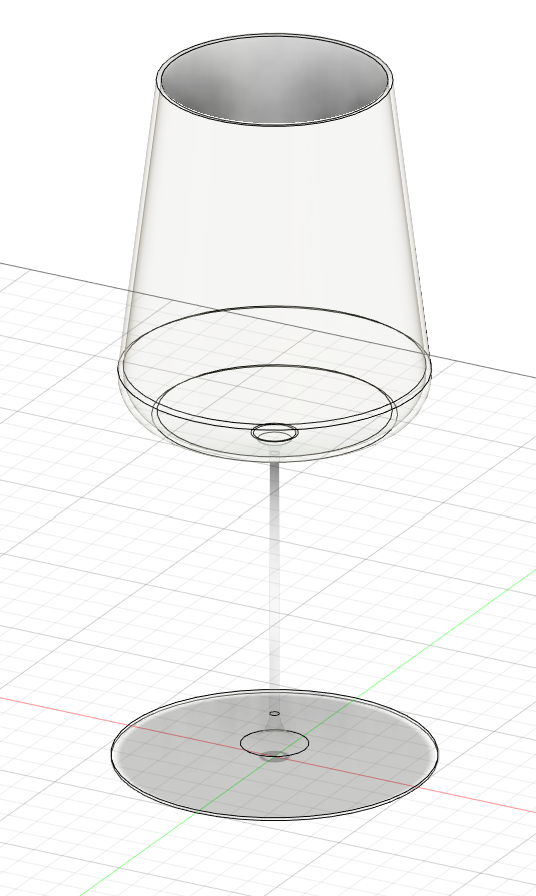
Object 2 : Wine Glass
After working on the Switch, I decided that I wanted to do more with organic shapes. It was hard to find objects that weren't too complex, but I eventually decided that a wine glass would be a good candidate.
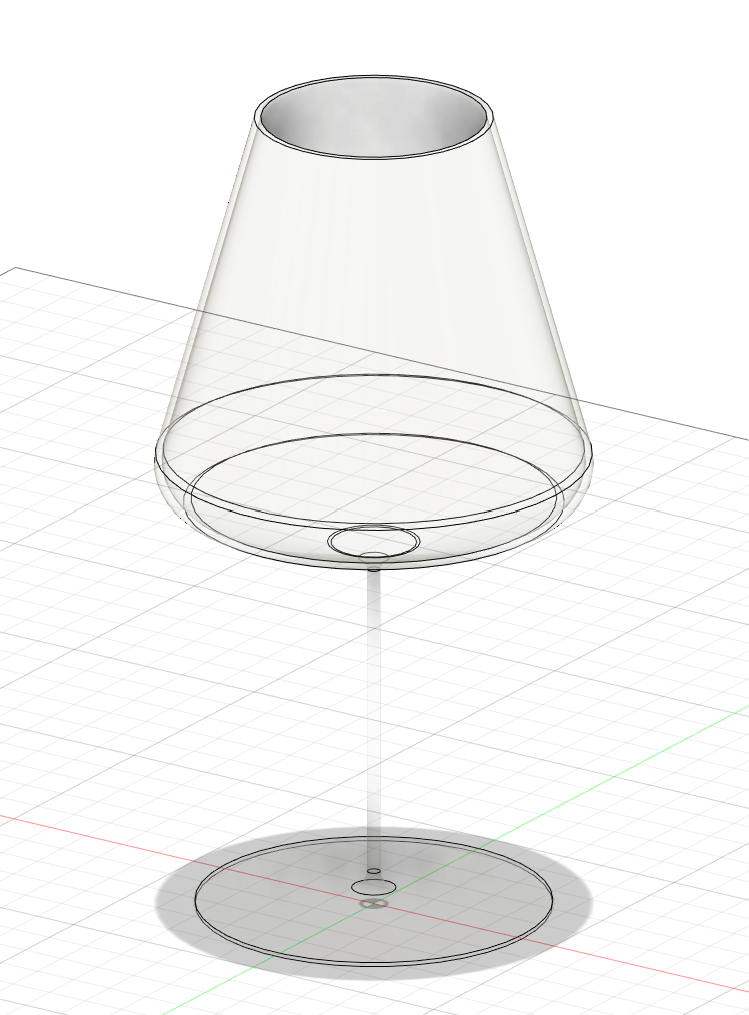
At first I experimented with a couple of spline-based models, which ended up looking completely crazy. I think that I probably could've gotten a reasonable product with a bit more fiddling, but I became convinced that a simple approach was more likely to succeed. Here is an example bad wine glass (left two). Next I tried a simpler method, drawing straight lines where I wanted them and then just filleting the edges to get a more rounded shape. This was far more successful, though I was eyeballing it, so the proportions were a little strange (right two):
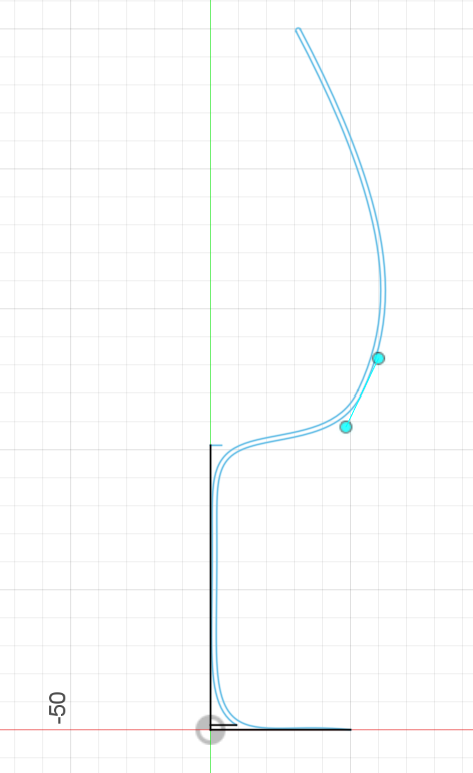

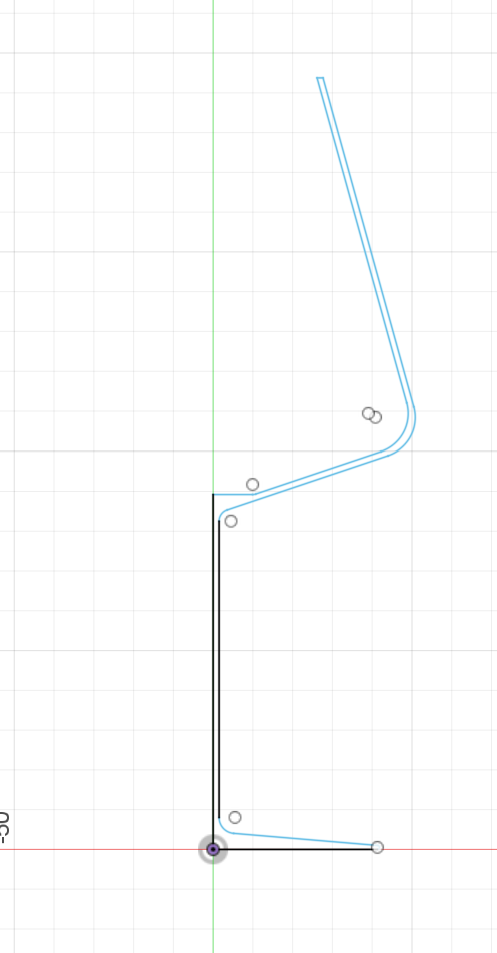
All that I had left was to get the right lengths / angles in, and I had a half-decent result! It still had those annoying lines wherever points were rotated around the axis, so I'll have to figure those out ASAP:
Laser-Cut Box
For my box, I looked around a bit for other designs, but I eventually decided that (at least before the 3D printing unit) I wanted to keep the box construction pretty simple. I ended up going with the same form as the box from the tutorial for the basic design.
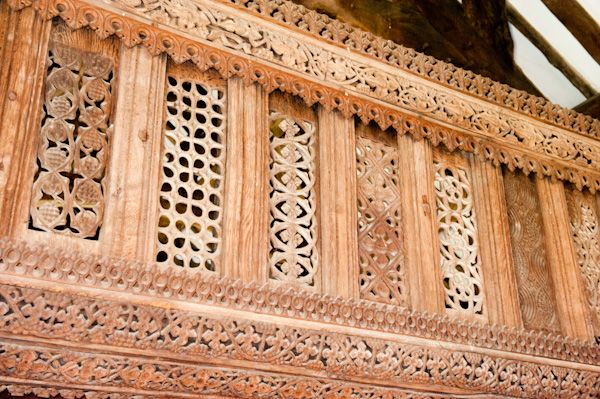
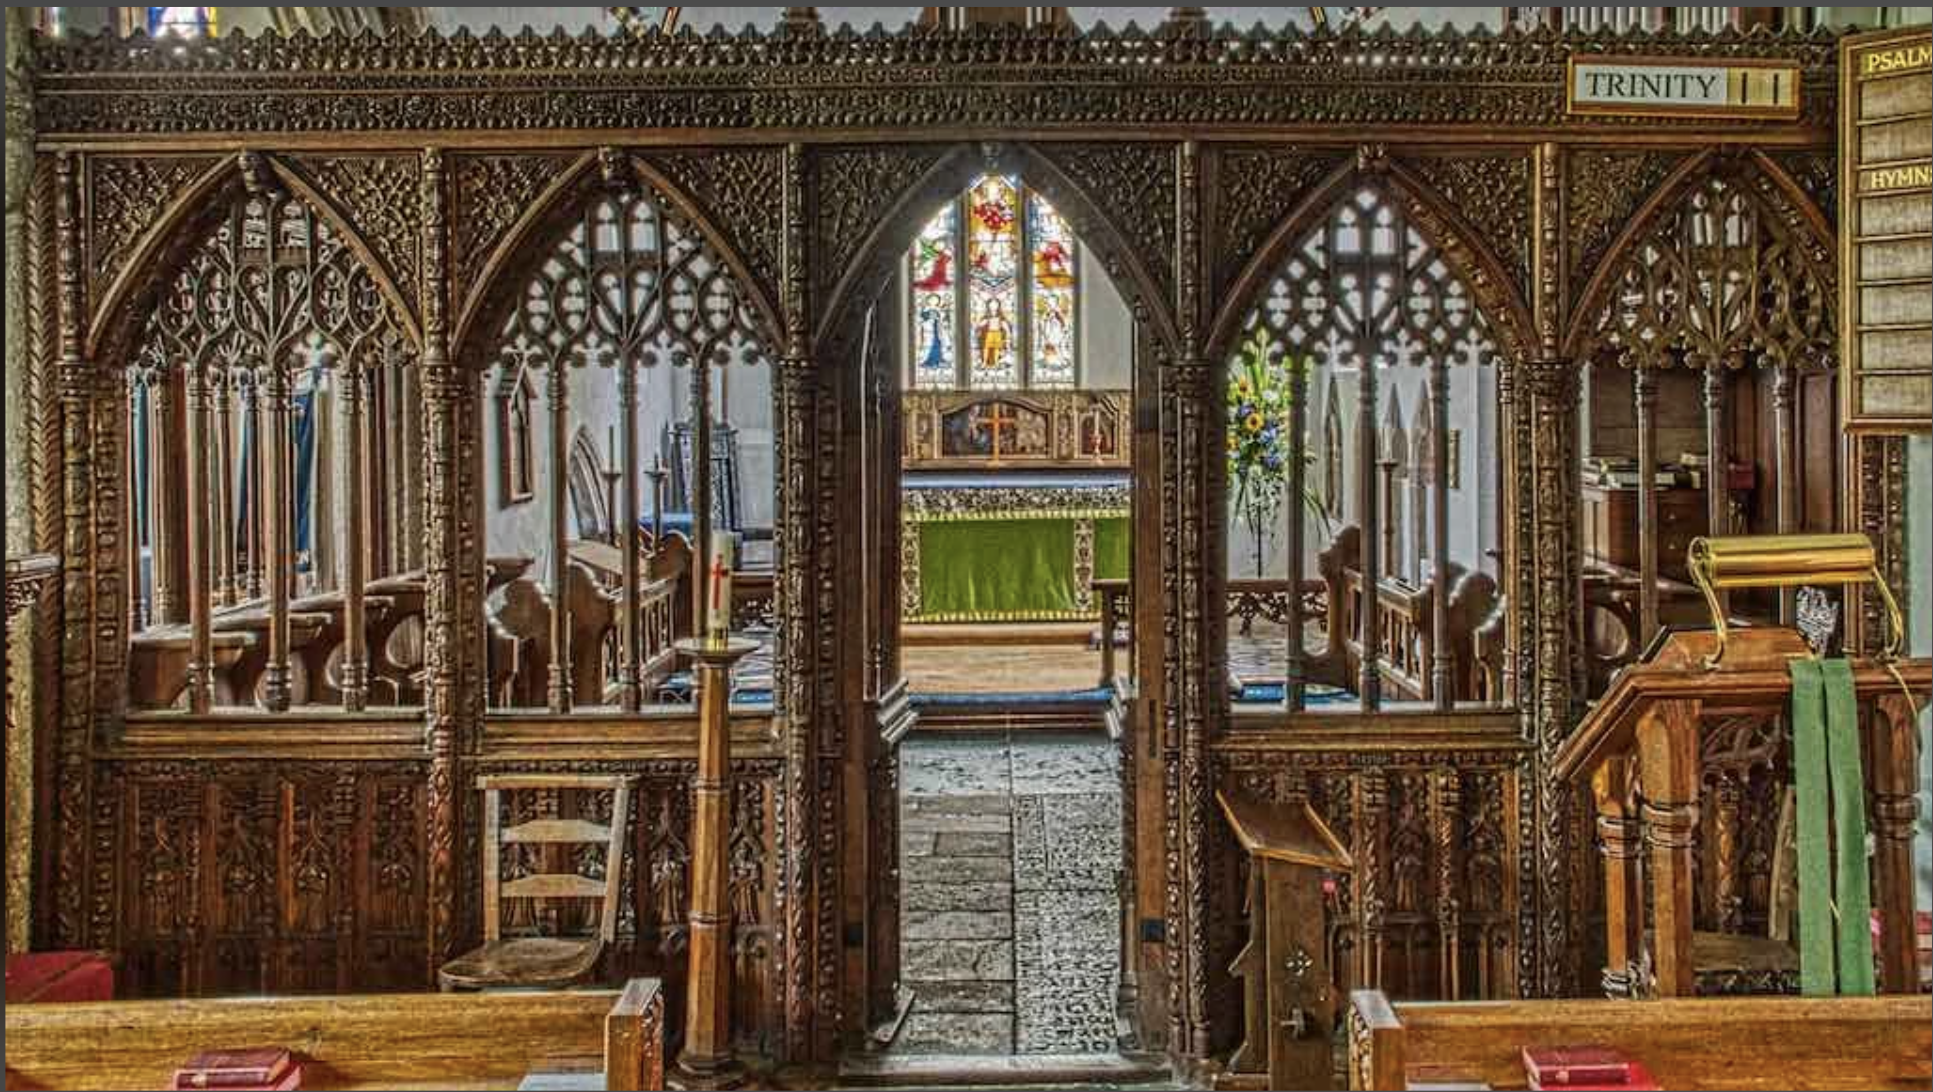
Still, I wanted to do something to make the box my own! I eventually decided that I wanted the box to have a lid that felt semi-permiable, more like a screen than a real top. I was inspired by wooden screens that I remember seeing in churches, which I found out are apparently called Rood Screens (left and middle). While looking at these, I also ended up finding some examples of cool wood lattice work from the Islamic world, called Mashrabiya (right), which seemed more like what I was going for.

Eventually, I made a box in Fusion, and used circular and rectangular patterns to design a box top:
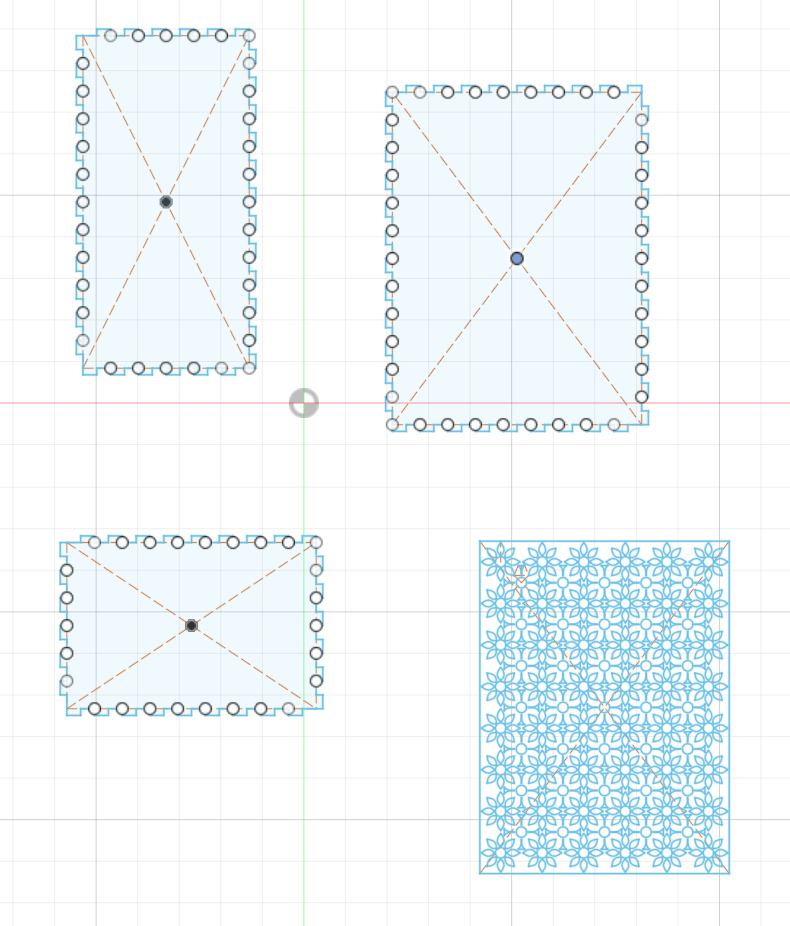
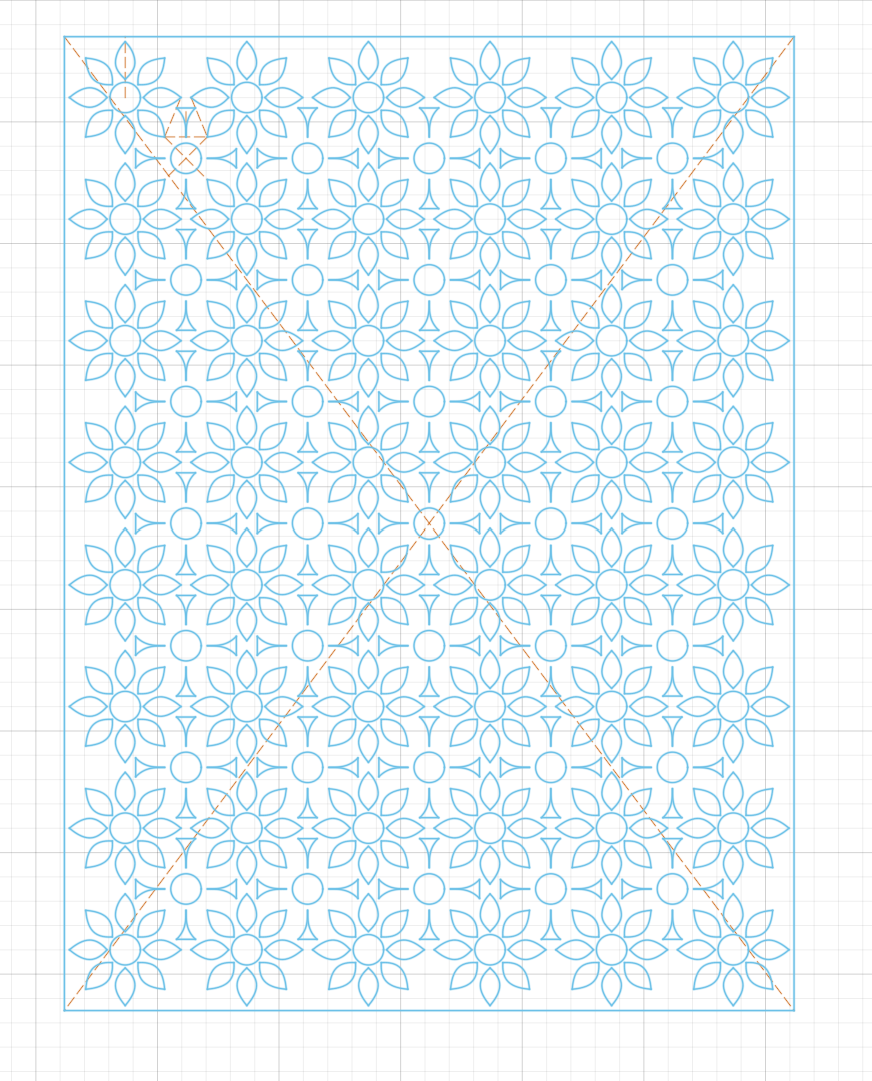
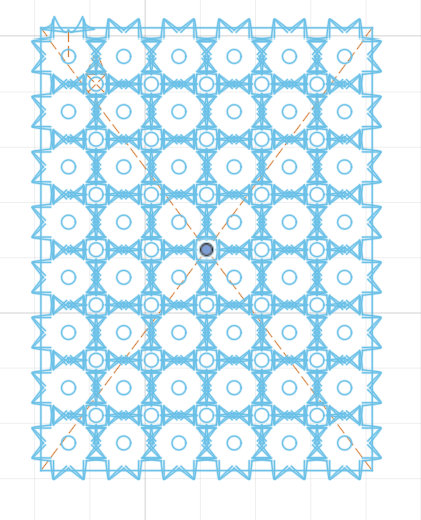
After running into so many problems with scaling and moving things around in the modelling exercises, I wanted to make a point of better organizing my model this time around. I put each box side on a seperate sketch, and I tried to anchor each one on a single arbitrary point so I could move them around easily. This mostly worked, except that the pattern on my top would go crazy when I tried to move it for some reason (I think a construction line got attached to some wrong imaginary line? But then I couldn't examine it because it caused so much lag I had to shut it down). See craziness below:
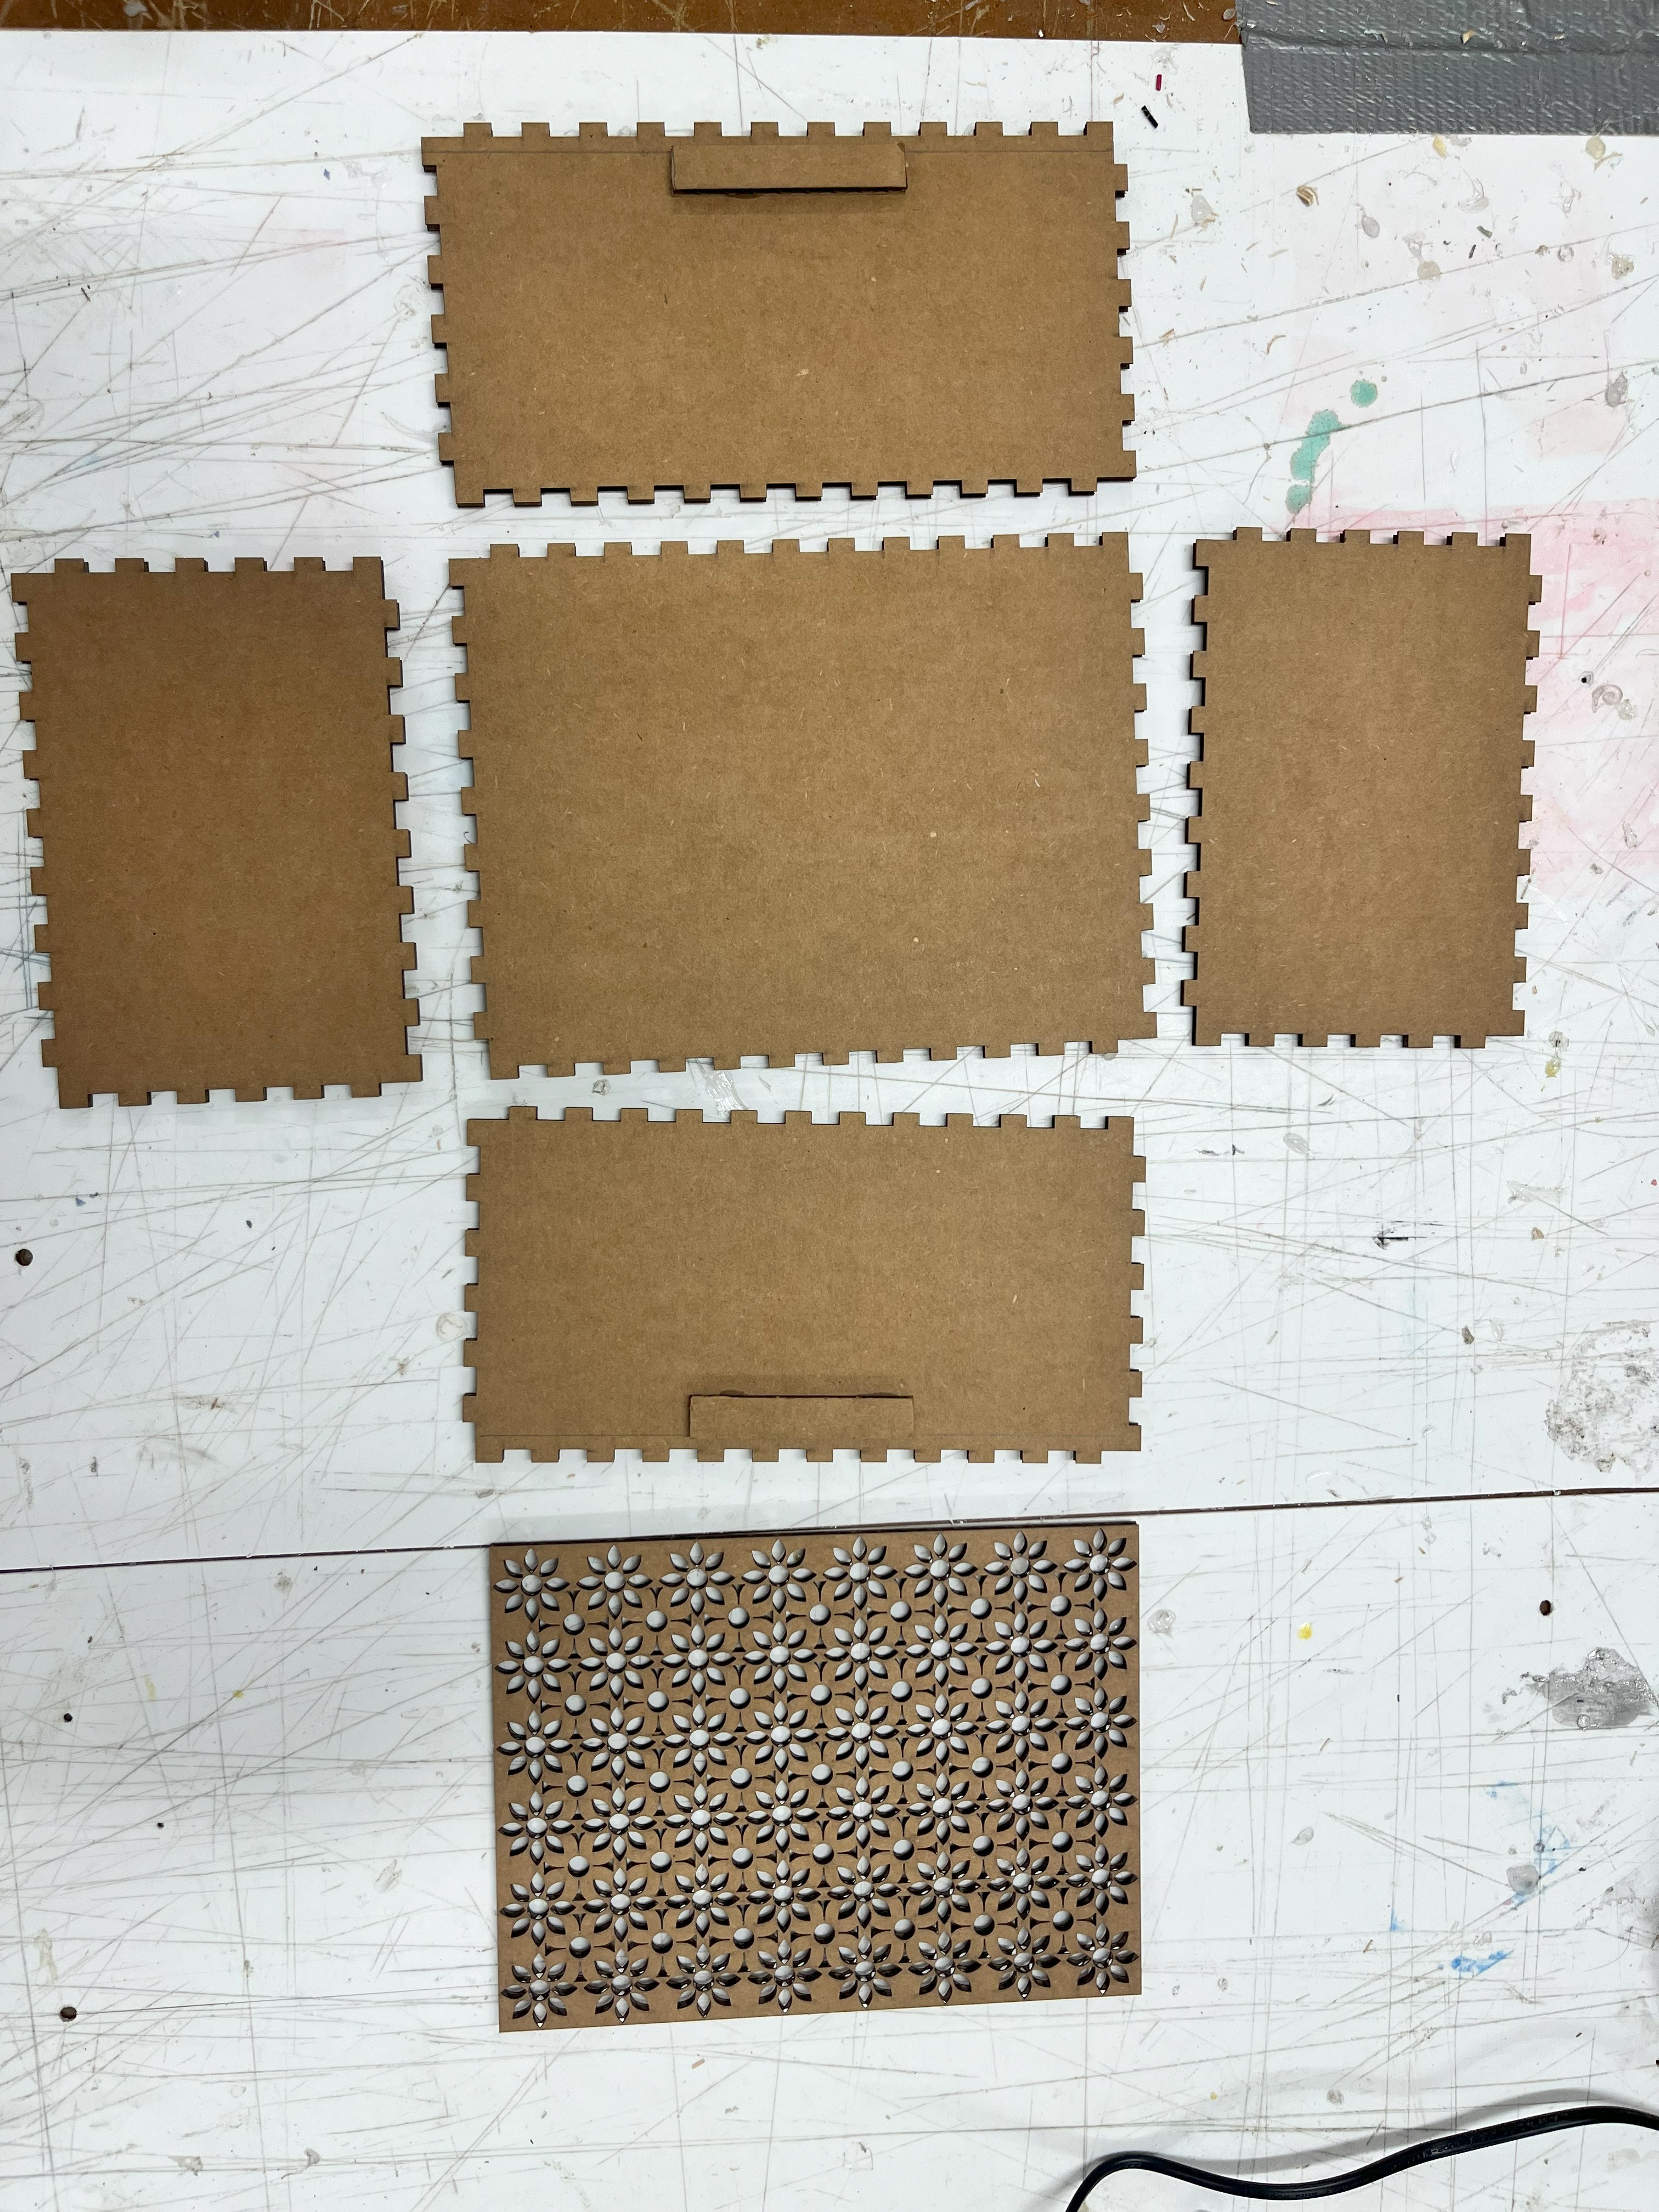
Printing mostly went off without a hitch. The top took like half an hour because it was so intricate, which I didn't entirely anticipate, so I'll be sure to block out more time if I'm ever making crazy designs again. I assembled with tape since the connections were a little loose, and I superglued some cardboard bars onto two sides so I could have a rest for my top when I wanted it to be closed. Here are some pics from printing and assembly:

And here's my final box:
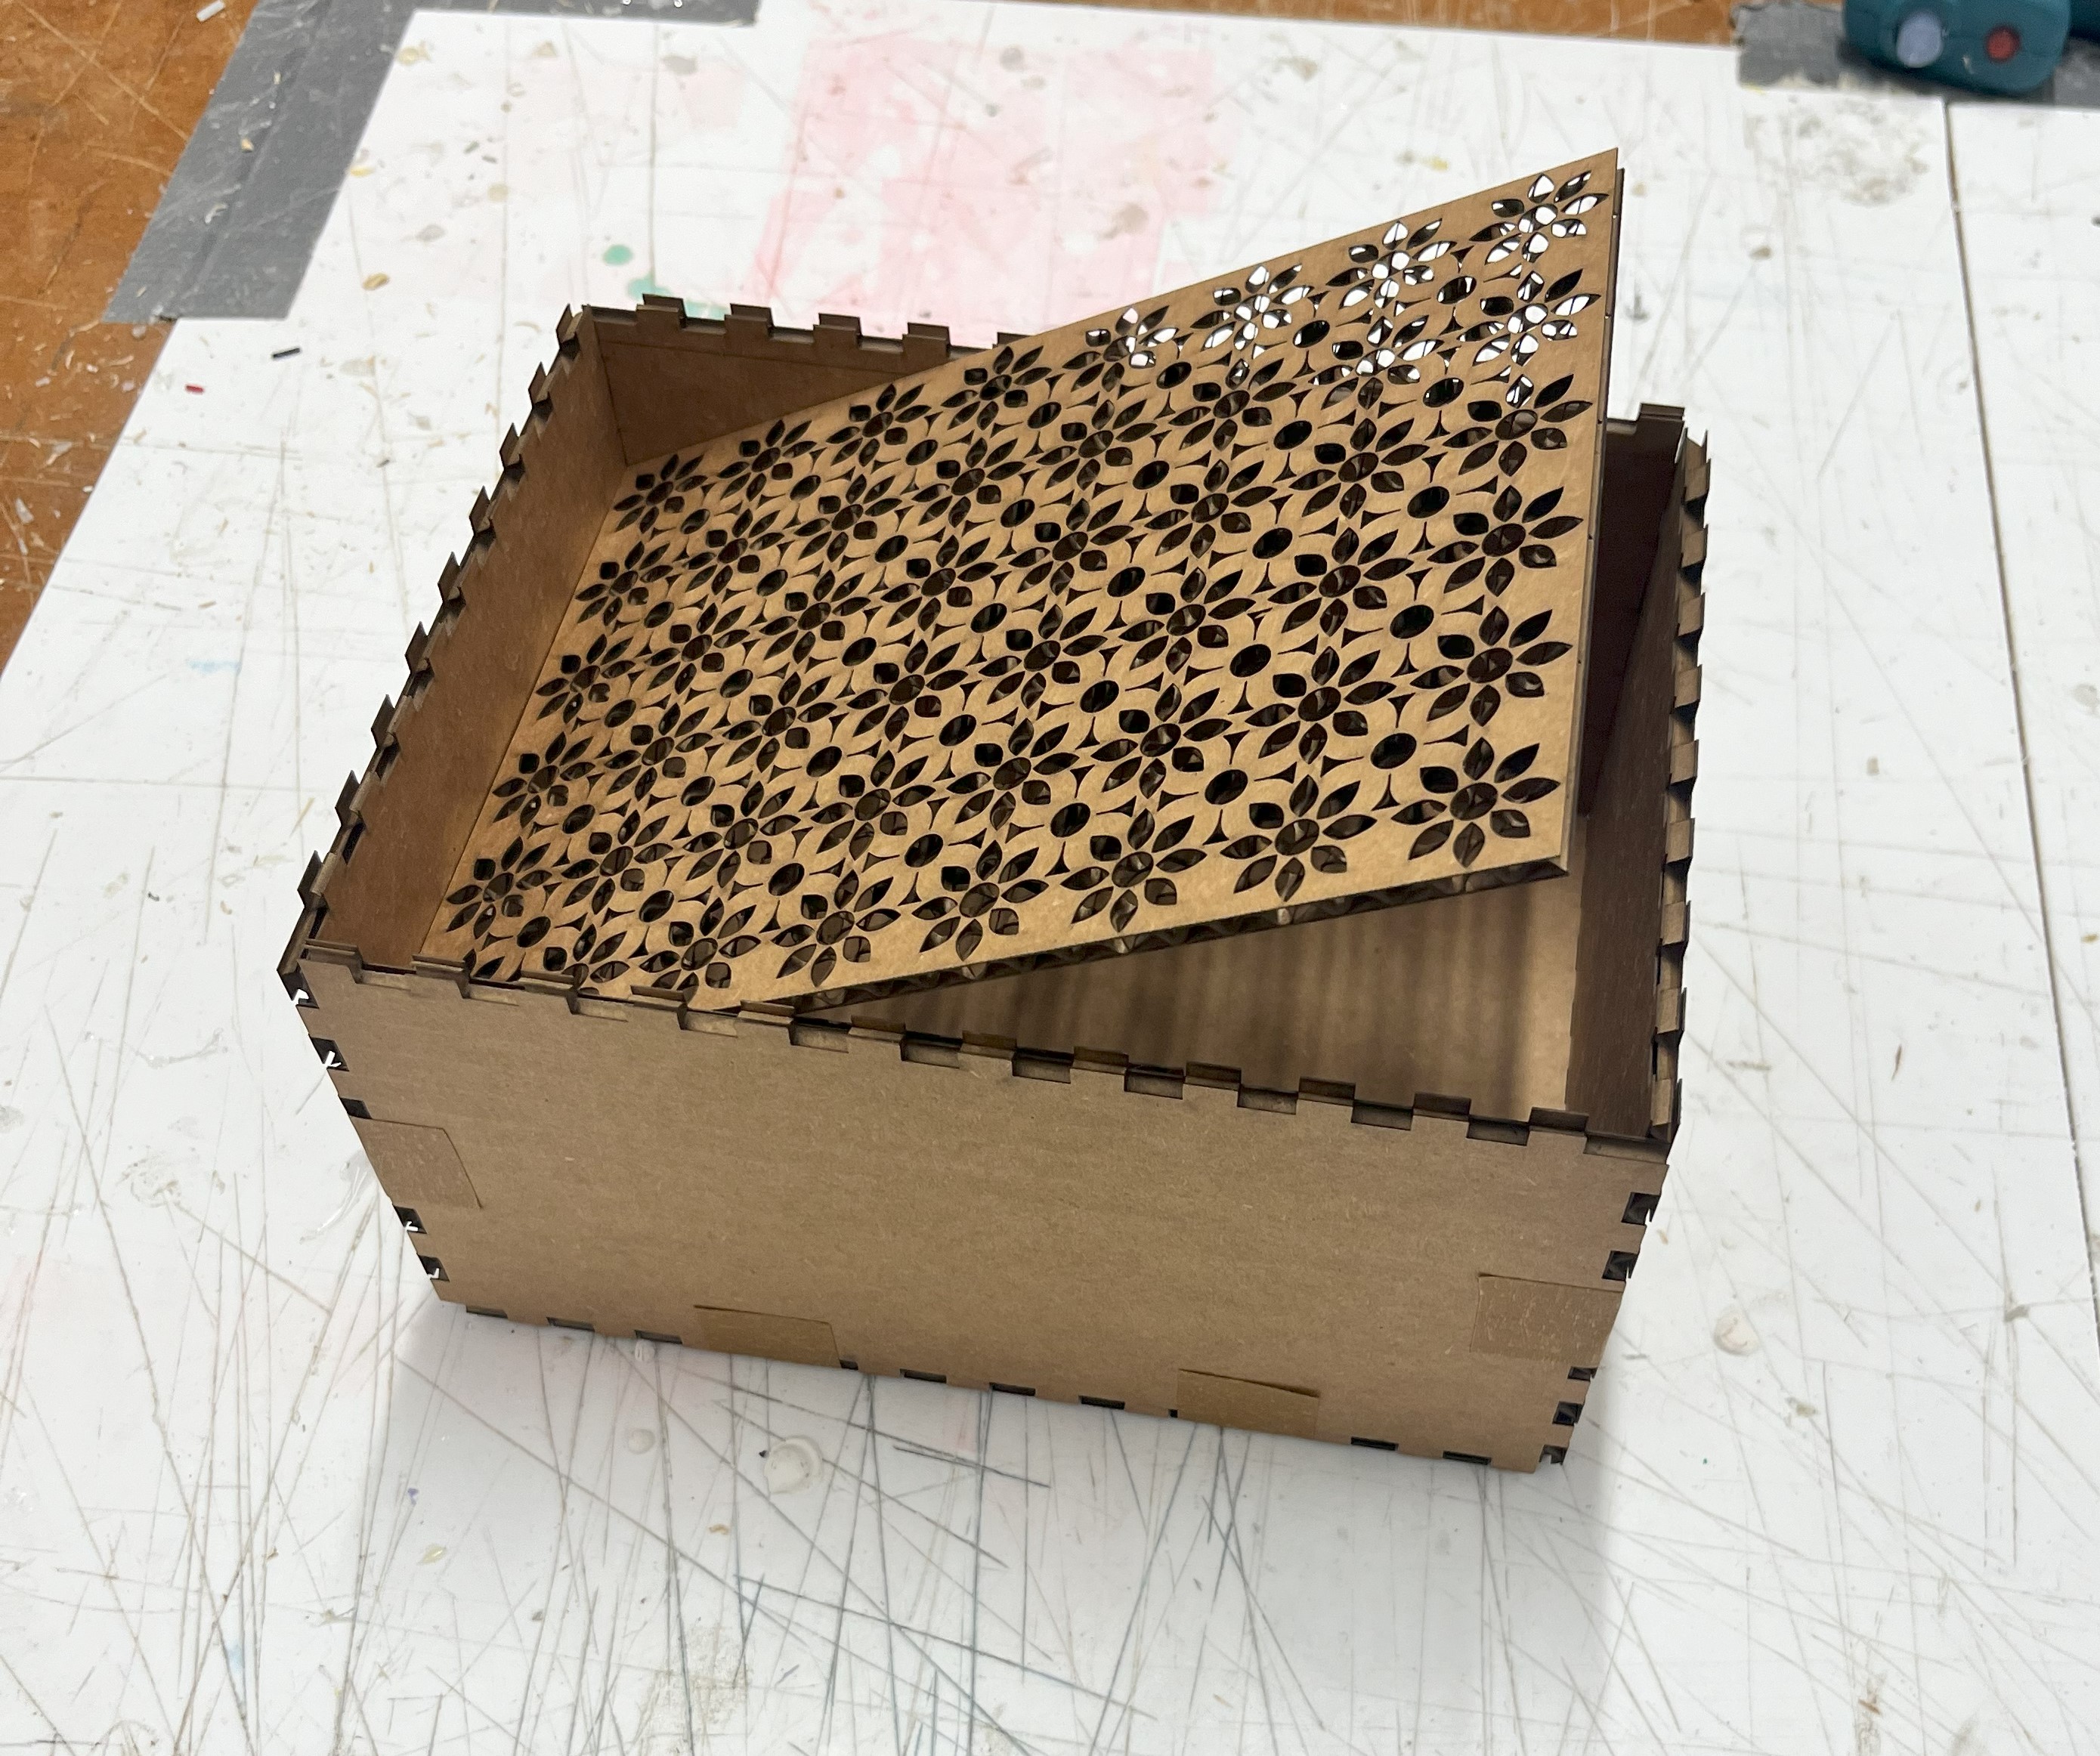
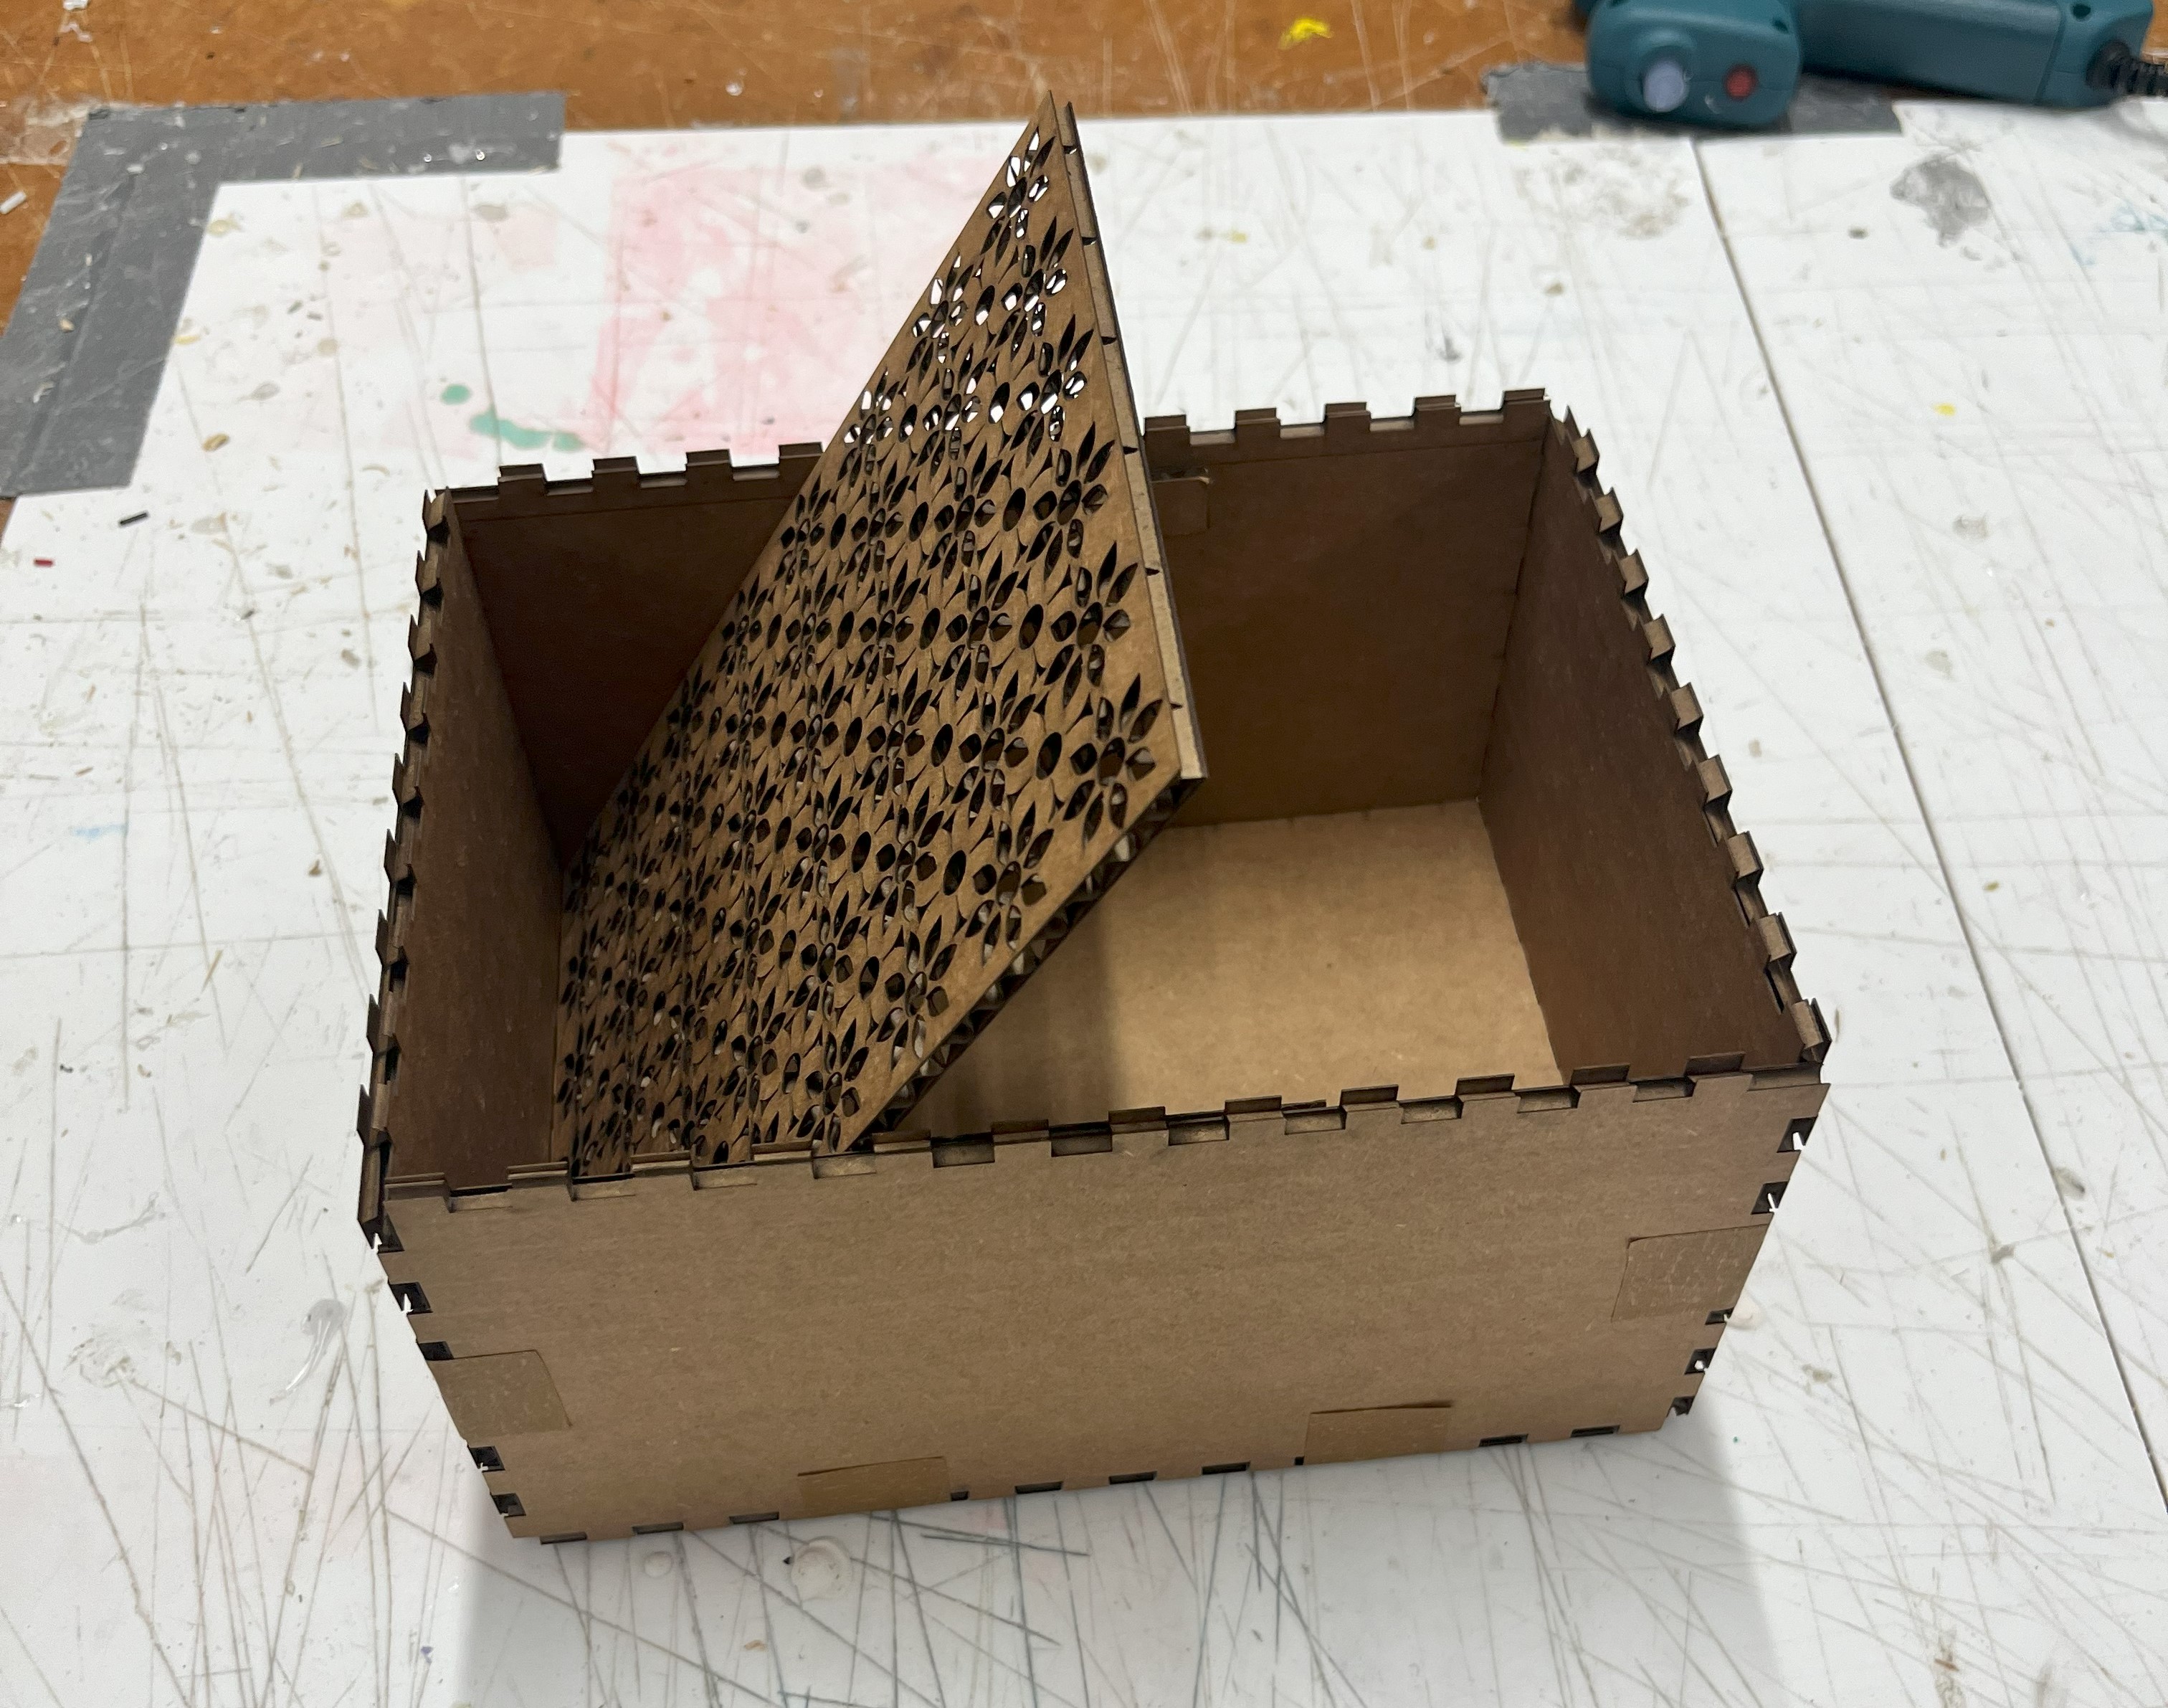
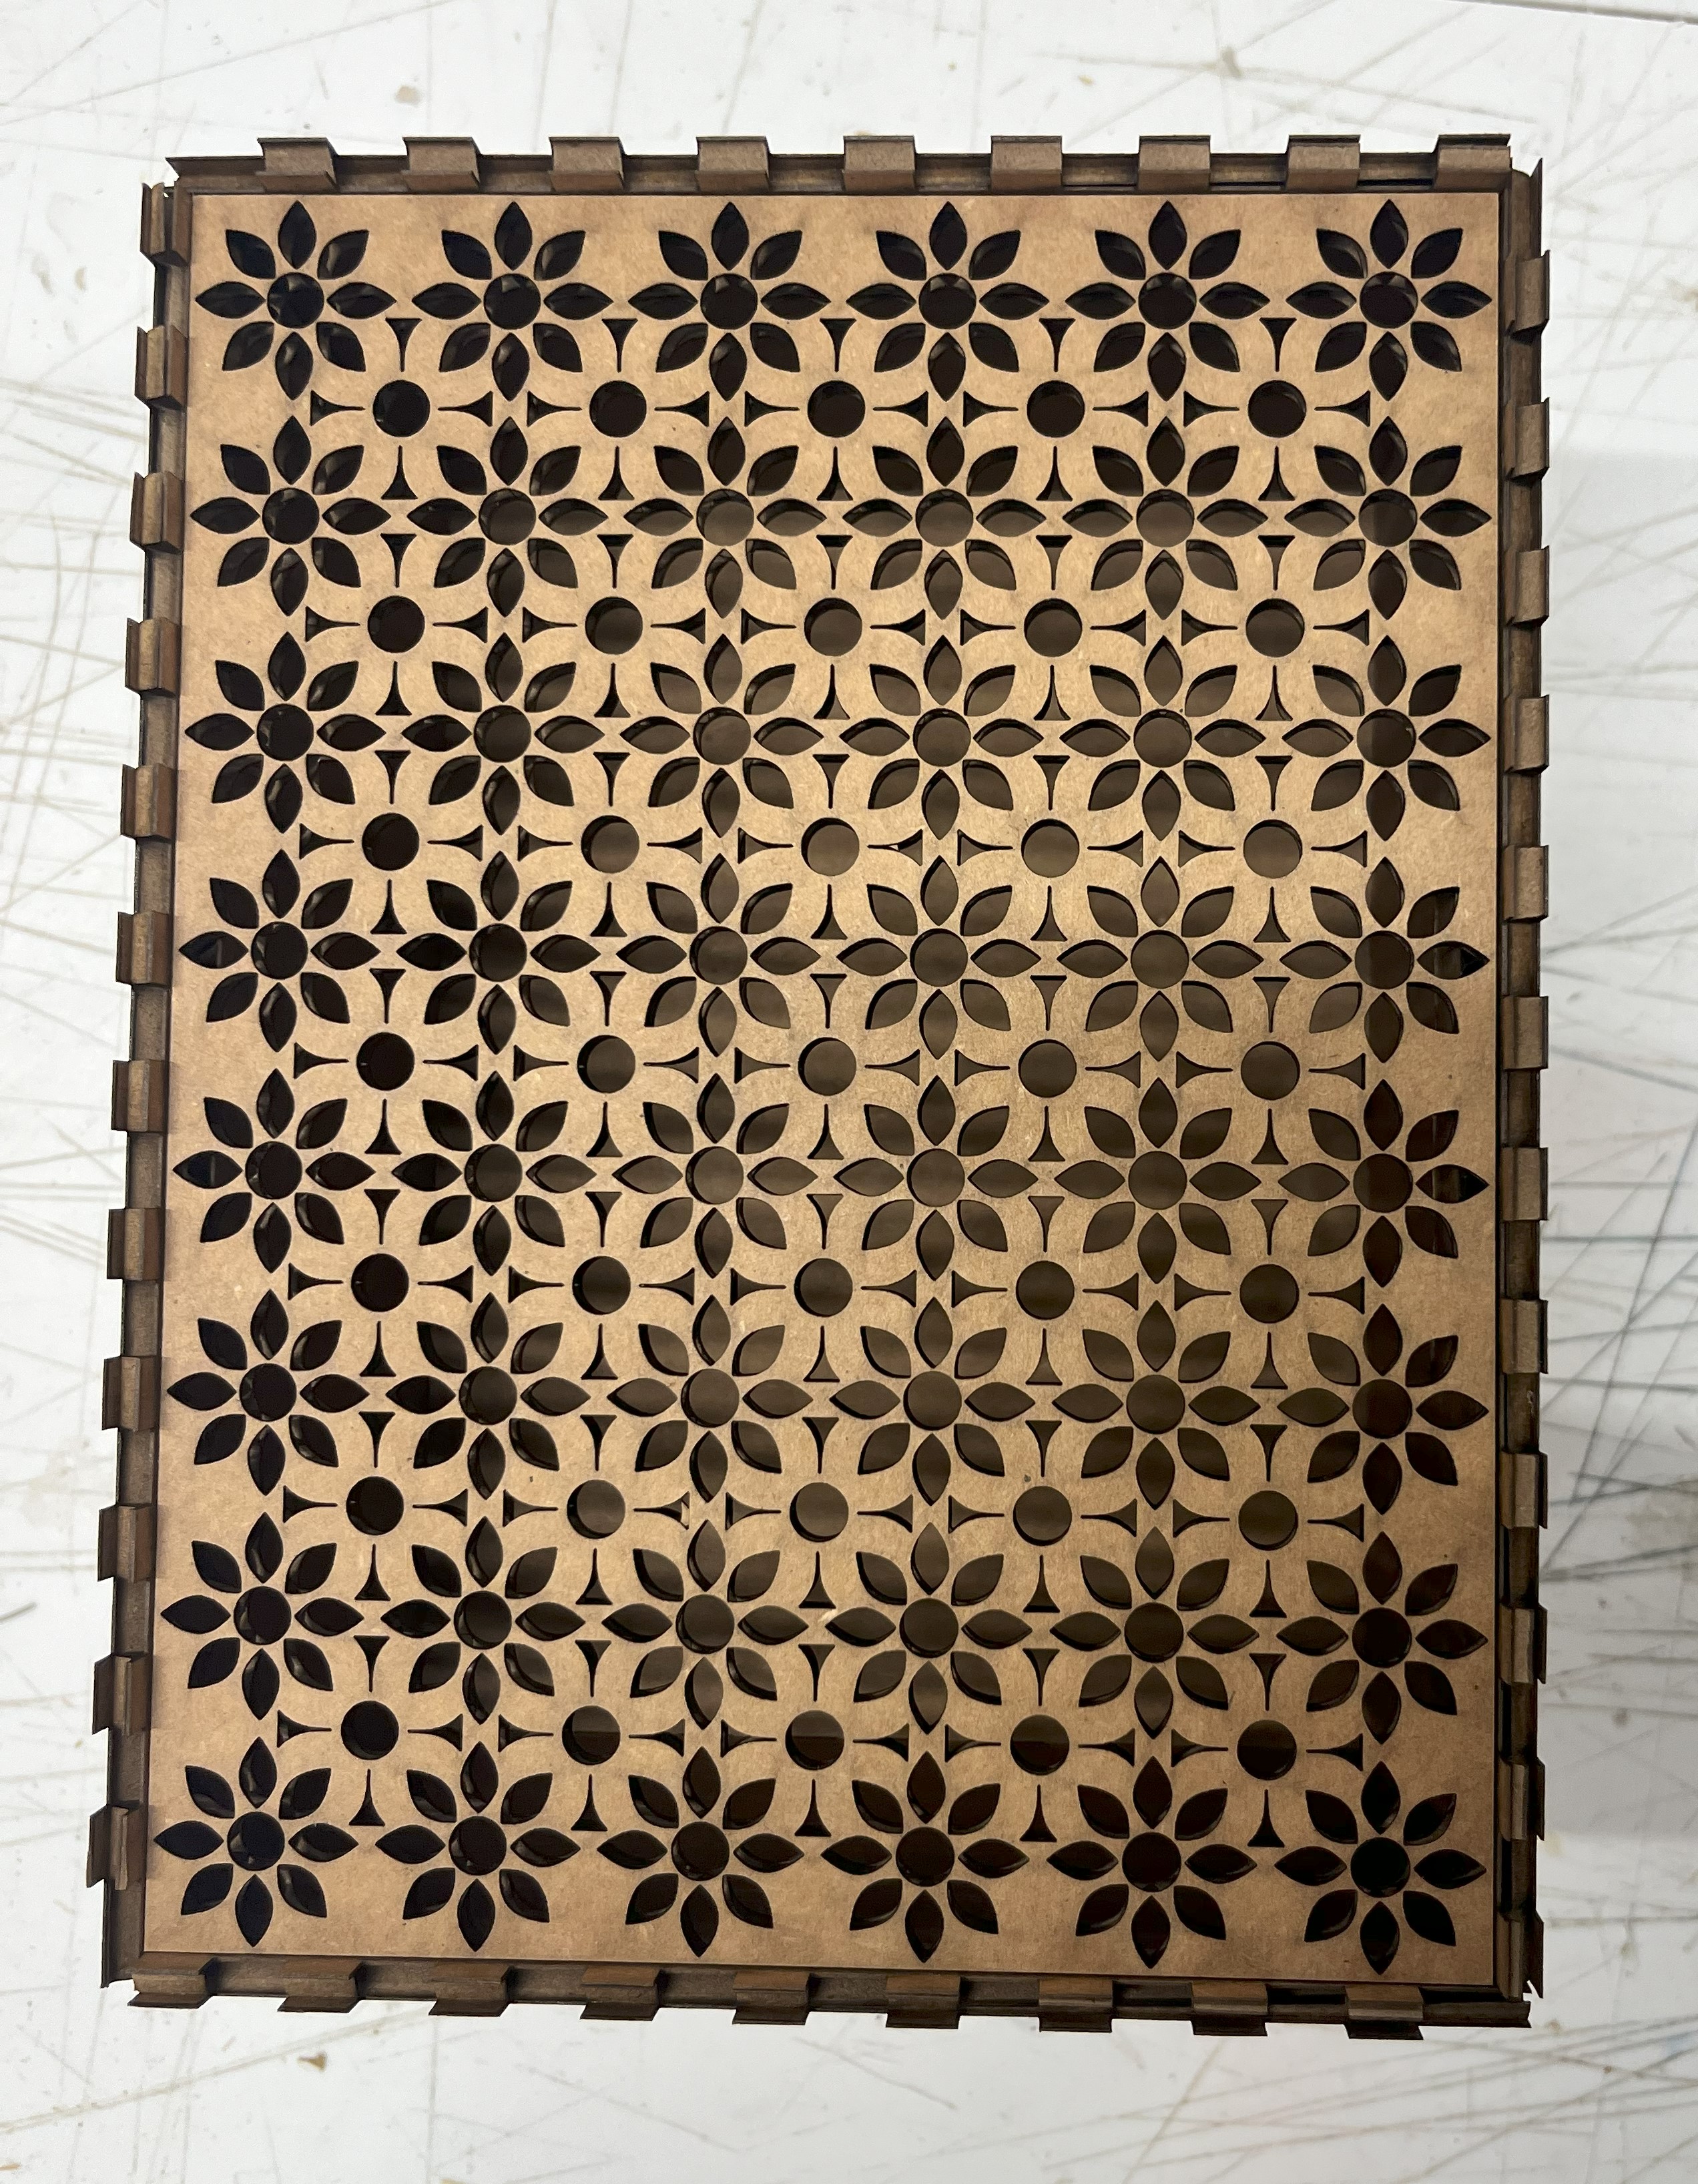
I really like the design overall! One thing I didn't account for is that since the top sits inside the box, I didn't need the top layer of teeth, but it sort of makes the box look like a castle, which is fun. I am excited to hold many things in this as the semester progresses!
—Thomas